Thursday, October 27, 2011

A rug can make all the difference...

Warning. This is not one of those inspiring posts where I show you a drab room and then throw in a great rug and it makes all the difference and Voila! A perfect room. Nope, quite the opposite actually...

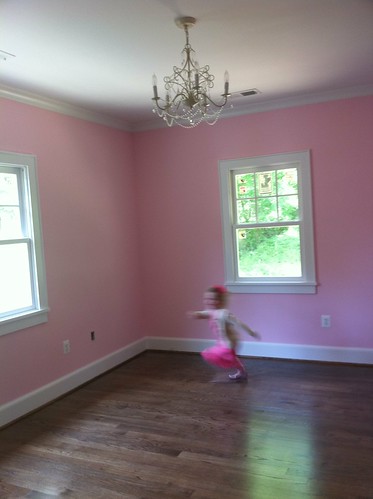
This is the story of what happens when your husband takes your 4 year old to go pick out a rug as a "bonding activity" while you are taking your younger daughter to a gym class. This is what happens when your daughter picks the ugliest rug in Pottery Barn Kids and then gets totally attached to it, so when your husband says, "You can return it!", you know you really can't without being the horrible witch of a mother who would rather have a pretty room than a happy child.

That being said, I finally finished putting together Maya's room. In a way, the rug freed me. I didn't have to obsess over every decorative accent-the room was never going to be one of this hip and stylish little girl's rooms you see on Pinterest. Nope, it was going to be your average 5 year old girl room.

We painted the room the same color that she had in her room in the old house. Pink.


Then we filled it with all of Maya's furniture, toys and treasures (ie. crap). How many doo dads and thingamagiggys can a 5 year old have? A LOT... So now it looks like this:
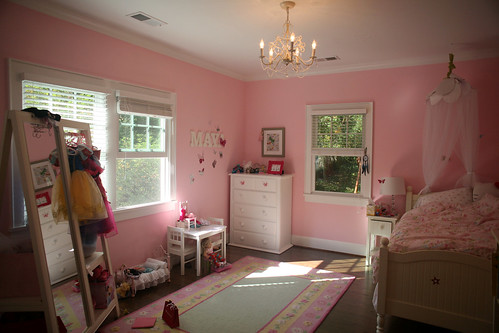
RANDOM_10 17_0259_edited-1

See the ugly rug??

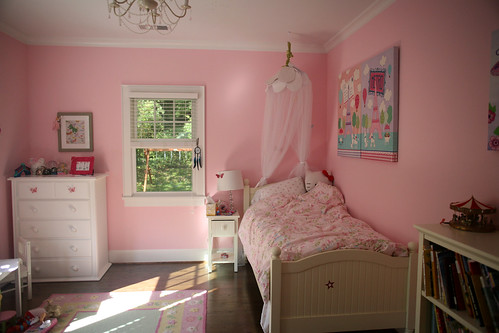
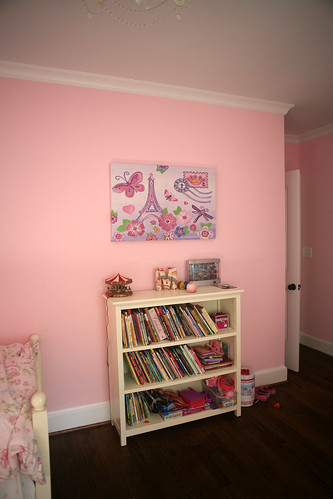
In Maya's old room, I filled the largest wall with a collection of picture frames of her and her friends and family. I wasn't sold on doing it again, so I figured I'd just get some girly prints--I scored big at Home Goods one day:

RANDOM_10 17_0257_edited-1

RANDOM_10 17_0256_edited-1

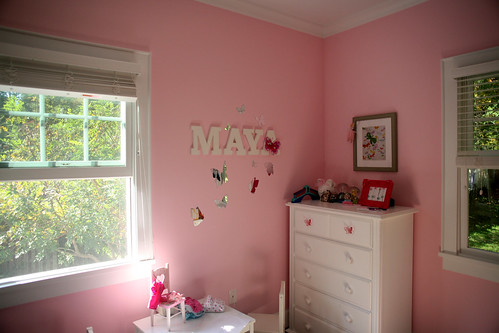
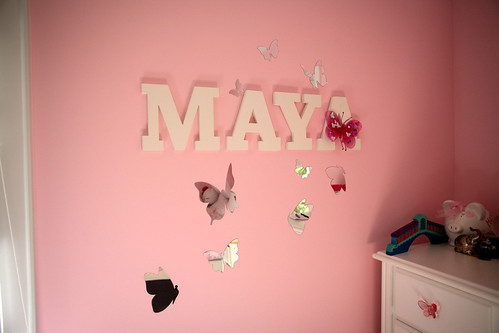
I took the letters that were above Maya's bed in the old room and put them on their own wall, so they could be more featured:

RANDOM_10 17_0254_edited-1

And then found some sticky mirror butterflies at Home Goods that were about $6..

RANDOM_10 17_0255_edited-1

And that there is the girliest room you'll find. And you know what? She loves it. So I guess that's all that matters...right??

Tuesday, October 25, 2011

Halloween Decor

I can't say that in the past we've ever done that much Halloween decor, but after seeing our kid's fascination with our neighbor's big blow up pumpkin on their front yard, I decided to head to the store to do up our outside...

First I went to Target. That was a BUST. Second week of October and almost all of the Halloween decorations were gone and they were making room for Christmas stuff. Say what?

Next stop, Party City. MUCH better. I managed to score a ginormous spider, a bunch of webbing and some Halloween pumpkin lights.

10 25_0310_edited-1

10 25_0306_edited-1

But that wasn't enough-I needed some crows. Couldn't find any at AC Moore, but I did find a cute Trick or Treat sign--the candy corn sold me, since I have two big candy corn fans in the house.

And finally, at Michael's, I found crows...and they had some sparkle, just to make them even more attractive.

10 25_0303_edited-1

Of course, Maya and Zoe couldn't resist the fun decorations at the bird store in the local shopping center, so we got one of those too:

10 25_0312_edited-1

How much dorkiness would I reveal if I said I was tempted to get one for every holiday? ;)

So, here is the whole picture...I don't think we went overboard, do you?

10 25_0306_edited-1

Monday, October 24, 2011

My first encounter with spray paint.

Spray painting is all over the blogosphere. Amy spray painted this cool mirror. Sherry spray painted her outdoor furniture. And Melissa did a lamp.

So I decided that I could do this. How hard can it be to yield a bottle of spray paint and transform something completely?? Well, it's not that hard. But I definitely lost more than a few brain cells.

We bought some gorgeous mums when we went apple picking and I really wanted to decorate our front walk with them. However, the plastic planters that they came in just weren't cutting it. I looked around for some cool planters that had a modern twist but were simple, but couldn't find anything--October, as it turns out, is a hard time of year to look for outdoor decorating stuff!

So I decided to tackle my first spray painting project. I picked up some of those basic terracotta planters you find in any gardening section-I got them at Home Depot. While at Home Depot, I picked up a bottle of spray paint--the color was called Oil Rubbed Bronze. I liked the fact that it had some metallic sheen to it.

I decided that I wanted to do the project in our garage. Why, you might ask, did I decide to spray violently toxic fumes in an enclosed space? Oh, just figured I'd avoid the breeze outside. So I went to task:

Before:


I sprayed the hell out of those mofos. And let me tell you, after about 5 minutes of spraying I got the stomach and head ache from HELL. I had NO idea why I felt like that, but I was almost doubled over. I sprayed the rest of them and walked out into the fresh air and started to feel better almost instantly..but they looked good!


I let them dry overnight and came back in the morning to replant the mums into them. Who knew that the mums were in a much wider planter than these? Not me...but I made it work. I put them up on our front walk and I think they look pretty nice, if I say so myself.

RANDOM_10 17_0276_edited-1

10 25_0304_edited-1

So go on...go buy yourself a can of spray paint today!

Sunday, October 9, 2011

Small Details.

Well, maybe bathroom mirrors aren't small details. In fact, after living without a bathroom mirror for 4 months, I am pretty sure they aren't!

We had a small glitch with bathroom mirrors. Originally, the builder had specified for one sconce above the mirror in the master bath--we have two matching vanities on opposite sides of the bathroom-quite possibly the best invention ever for a product hog (and by that, I mean my husband). In any case, we had our heart set on sconces that would go on each side of the mirror. Unfortunately, the builder had already installed the electrical for the single sconce. Not a real problem, he said, he would cap it off and install the new electrical and we could just get a mirror that was large enough to cover the cap. Well, that meant that we had to find a mirror with dimensions of 30"x40". That's a big mirror.

We finally found one at Restoration Hardware. And it was backordered. And backordered some more. And finally, on September 20-something it arrived on our front step (or garage, but these are small details). We were ambitious and thought we could install them ourselves. No dice-these suckers are not only huge but ridiculously heavy and the last thing you want in a bathroom is no mirror AND a huge hole in your wall. So we enlisted the help of one of our builder's men. Thank goodness. And now for the big reveal...

BEFORE:

33 - Trenton

Master Bath Vanity

AFTER:
(Excuse the bad lighting)

Blog_10 08_0239_edited-1

Blog_10 08_0240_edited-2

Blog_10 08_0237_edited-1